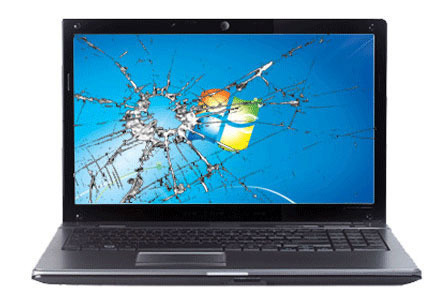
How to repair a laptop screen which is damaged?
Get all your answers below.

If you’re wondering how much it costs to fix a damaged laptop screen, you’ll be relieved to discover it’s not as pricey as you may think. Professional repairs typically cost approximately $300. If you’re comfortable working on your laptop on your own, you can typically locate new screens online for affordable rates – sometimes as little as $50 to $100 – and it normally only takes an hour or two to perform the repair process.
If you’re prepared to take the risk and do it yourself, you could wind up saving a machine you thought you needed to replace. Here are 5 methods to effectively replacing or repairing your damaged computer screen.
Total Time: 2 hours
Step 1-Understand your model and analyze the damage
Before you begin the process of replacing your screen, you must first determine what is incorrect and what has to be corrected. The sort of gadget you have, as well as its age, might impact how much you’ll have to pay for another screen, which may make finding a replacement tough. You should conduct some internet research to see whether you have the option of repairing the screen yourself.
Step 2-Turn it on!
The first step is to ensure that the device boots up properly and that the screen is the only problem. Connect your laptop to a secondary monitor as a test. If your laptop appears to be in good working order, the damaged laptop screen is most likely all you need to be concerned about. Keep in mind that certain laptops require certain function keys to be hit in order for an external display to function correctly.
You will also need to perform a thorough examination of your computer to establish whether the problem is limited to your screen. A damaged graphics card or a computer that refuses to boot up suggest that a new screen will not enough to get you back up and running.
Also, if the frame of your laptop has been physically damaged, fixing the screen may be tough. Once you’ve examined your gadget and established whether you can repair it yourself, it’s time to choose the perfect screen for your computer.
If you are concerned about the repair of your laptop’s touch screen, it may be more difficult to resolve this issue without the assistance of a specialist. Because these displays are created with elements such as sensitivity in mind, it’s a good idea to have an expert look at it, even if it means spending a little more than expected.
Step 3-Locate the proper screen.
One of the major reasons you should know your laptop’s model is to ensure that you get the right replacement screen. While a lot of firms provide laptop screen repair kits to make the procedure easier, if you purchase the incorrect screen, you will be unable to perform any repairs. If you’re having trouble determining your computer model, go to the “Settings” menu and look for the serial number to help you in your search.
Finding the perfect screen for your smartphone, fortunately, does not have to be difficult. Often, merely typing your laptop model number into the search field of an internet shop can get the results you want. You may also wish to use the search phrase “LCD” to limit down the options for computer accessories. Screens should be reasonably cheap for the most part, and you may even be able to find some for around $50, depending on the sort of computer you have.
Some vendors may use a different method of identifying the model of your laptop, so double-check that you selected the correct choice before you buy. Almost all of the necessary information should be available on the seller’s ad. Again, compare your device’s specs to the screen you’re buying, and make sure the video cable on the back of your screen matches what the dealer offers online. Most of the time, it is quite simple to determine whether or not the appropriate screen is accessible.
Step 4-Open the screen with the appropriate tools.
This is not an all-inclusive guide for all computers, but it should cover the fundamentals for the majority of machines.
A few tools will be required to correctly install your new screen. These tools may make the process easier and help you to resolve problems more quickly.
Prepare by having the following items on hand:
*A clean, level surface on which to operate
*To remove the screen bezel, use a putty knife or other comparable tool.
*a screwdriver that is magnetic
*To remove the bezel, use a pin or needle.
*A tiny dish for storing screws
To mount the replacement LCD to the laptop frame, use adhesive or tape.
Screen repair kits are also available for some models, so it may be worthwhile to look into your specific model to see if they are accessible. These kits supply you with everything you need ahead of time, allowing you to get to work without worrying about missing an important item. Of course, objects from your own house can function just as well while saving you money.
After you’ve gathered the equipment you’ll need to replace the screen, you may begin fixing your smartphone. Place the closed laptop on the specified flat surface and keep your tools handy.
Step 5-Disconnect all power sources.
To avoid electric shock, switch off your laptop and make sure it is disconnected from a power source. After then, it’s a good idea to remove the battery to avoid causing any further problems.
After that, you should identify the stickers that cover the screws on the screen bezel. You’ll generally locate them near the bottom of your screen, where the hinges would be if your display was open. There need to be two.
Step 6-Remove stickers and screws with care.
After that, you’ll need to use a pin to remove the stickers on the bezel so you don’t damage them. You’ll need them later, once your screen is fully fitted, so keep them safe and store them sticky side up so you may reuse them. Put them somewhere secure so you can find them when you need to attach your new screen.
The screws that are now exposed should be removed using a screwdriver. Depending on how securely they were screwed in during production, you may have some difficulties. In general, assuming your previous screen is reasonably aligned, removing the screws should be rather simple. Put them in the dish
Step 7-Remove the bezel
It’s now time to remove the bezel with care. Take care when removing the bezel from your old screen since you will need to reinstall it after the screen has been replaced. You should be able to pull your screen out of your laptop casing using a putty knife or other flat item.
It may need some work to entirely remove it. Don’t be frightened if you hear some plastic breaking; this is the unfastening of the plastic tabs that secure your screen to your casing. If you’re having problems removing the old screen, it’s possible that the screws at the bottom aren’t loose enough, so pause and loosen them some more before attempting again.
You may also have the issue of your screen being stuck on the hinges. You can typically get it out of the casing by gently moving it.
Step 8-Take out the LCD.
The removal of the LCD will be one of the most difficult aspects of changing your laptop screen. To begin, ensure that the bezel is entirely removed so that you have unrestricted access to the LCD screen. It will be attached to the laptop’s metal frame and must be removed from the left and right sides.
Before you can raise the screen slightly away from the metal frame, you’ll need to loosen two additional screws at the top corners. There will most likely be a few additional screws fastening the LCD on the sides, which will also need to be unscrewed. Heavy strength tape may have been used instead in some situations.
Step 9-Unplug the cable connections
After removing the attachments, your screen should now be on top of your keyboard. It might be difficult to ensure that there is enough space between the LCD and the metal frame, but you must be careful not to damage the video wire that goes from the back of the screen to the body of the laptop. If this is damaged, you will need the assistance of a professional to fix it.
It’s now time to unplug the wire from the LCD. The connections are generally found in the middle, although they can also be found towards the bottom of your screen. Because glue was most likely used to join the two, you will need to gently pull one apart from the other.
There may be some tape that has to be removed as well, but disconnecting your LCD from the video port should be rather straightforward. Place it away from your tools.
Step 10-Insert the new screen here.
You should be able to see where your new screen will go when you remove the old one. Place it face down into the frame to ensure a precise fit. After that, rejoin the video connector such that it sits precisely where the previous LCD did. Make sure it’s as straight as possible before attaching it with tape or glue.
You can buy the laptop screen from pazdb.com
Step 11-Reattach the bezel
After that, make sure the sides are secure. Replace the screws on the sides and top, as well as any tape that was used to keep everything together. After you’ve properly tightened everything, replace the bezel. Arrange it such that it snaps securely into the screen case and cannot be easily unfastened.
After you’ve ensured that everything is properly snapped into place, reinsert the remaining screws into the bezel. There should be no visible fractures around the borders of the screen. After inserting the screws, reconnect the screw covers using your pin or needle.
Step 12-Turn on the power.
You should be able to restart your computer at this point.. Replace the battery and reconnect your laptop to a power source before restarting it. If there is no display, you must double-check that everything was properly reassembled.
A specialist is not required to repair a broken laptop screen. If you have the time and desire, doing it yourself may save you a lot of money. You can have your laptop display back up and running in an hour or two if you follow these DIY methods.
Also Read
Mivi Play Bluetooth Speaker Review-Price, Features, Release Date, and Specifications